Building My Own Hosting Server (Completely Free — Just Electricity & Internet Bills!)
Remember when I wrote about solving theater connectivity nightmares? Back then, hosting anything on a public domain felt like climbing Everest. Well, life has a funny way of giving you second chances.
The Unexpected Gift
One random Thursday, my manager dropped a small box on my desk.
"Here, play with this," he said casually.
Inside was a Raspberry Pi 5 — brand new, smelling of possibilities.
Now, most people would immediately dive into GPIO pins, LEDs, and sensors. Not me. I stared at those pins for about 30 seconds and thought: "Nah, I have real problems to solve."
The Lightbulb Moment
You know how CIAA (Nepal's regulatory body) digs up old cases and reopens them when you least expect it? Well, I started looking at my own pile of unresolved problems the same way. I had a growing list of technical frustrations I kept ignoring:
Accessing my home server while traveling Sharing local projects without complicated port forwarding Running services without worrying about ISP restrictions Paying monthly hosting fees for side projects that barely make money Setting up CI/CD without burning through GitHub Actions minutes
Just like CIAA reopening old files, I decided to revisit these "pending cases" of mine. And staring at that Raspberry Pi, I realized: this little device could close all these cases. Permanently.
The Solution: Two Tools, Zero Monthly Costs
I didn't need complexity. I needed something that just works.
1. Tailscale — Secure Remote Access (100% Free)
Think of it as your own private internet. No matter where I am — coffee shop in Thamel or visiting relatives in Pokhara — my Pi is just there.
# Literally two commands:
curl -fsSL https://tailscale.com/install.sh | sh
sudo tailscale up
Done. My Pi now has a permanent address I can SSH into from anywhere. No port forwarding drama. No dynamic DNS headaches. Free forever for personal use.
2. Cloudflare Tunnel — Public Hosting (Also 100% Free)
Remember when public hosting felt impossible? Not anymore. Cloudflare Tunnel is like having a secret passage from your localhost to the internet — no open ports, no exposed IP, pure magic.
Install cloudflared
sudo apt update
sudo apt install cloudflared
Authenticate (one-time)
cloudflared tunnel loginThis opens your browser, you log into Cloudflare, pick your domain. Done.
Create your tunnel
cloudflared tunnel create my-tunnelThis gives you a tunnel ID and a credentials file. Keep that safe.
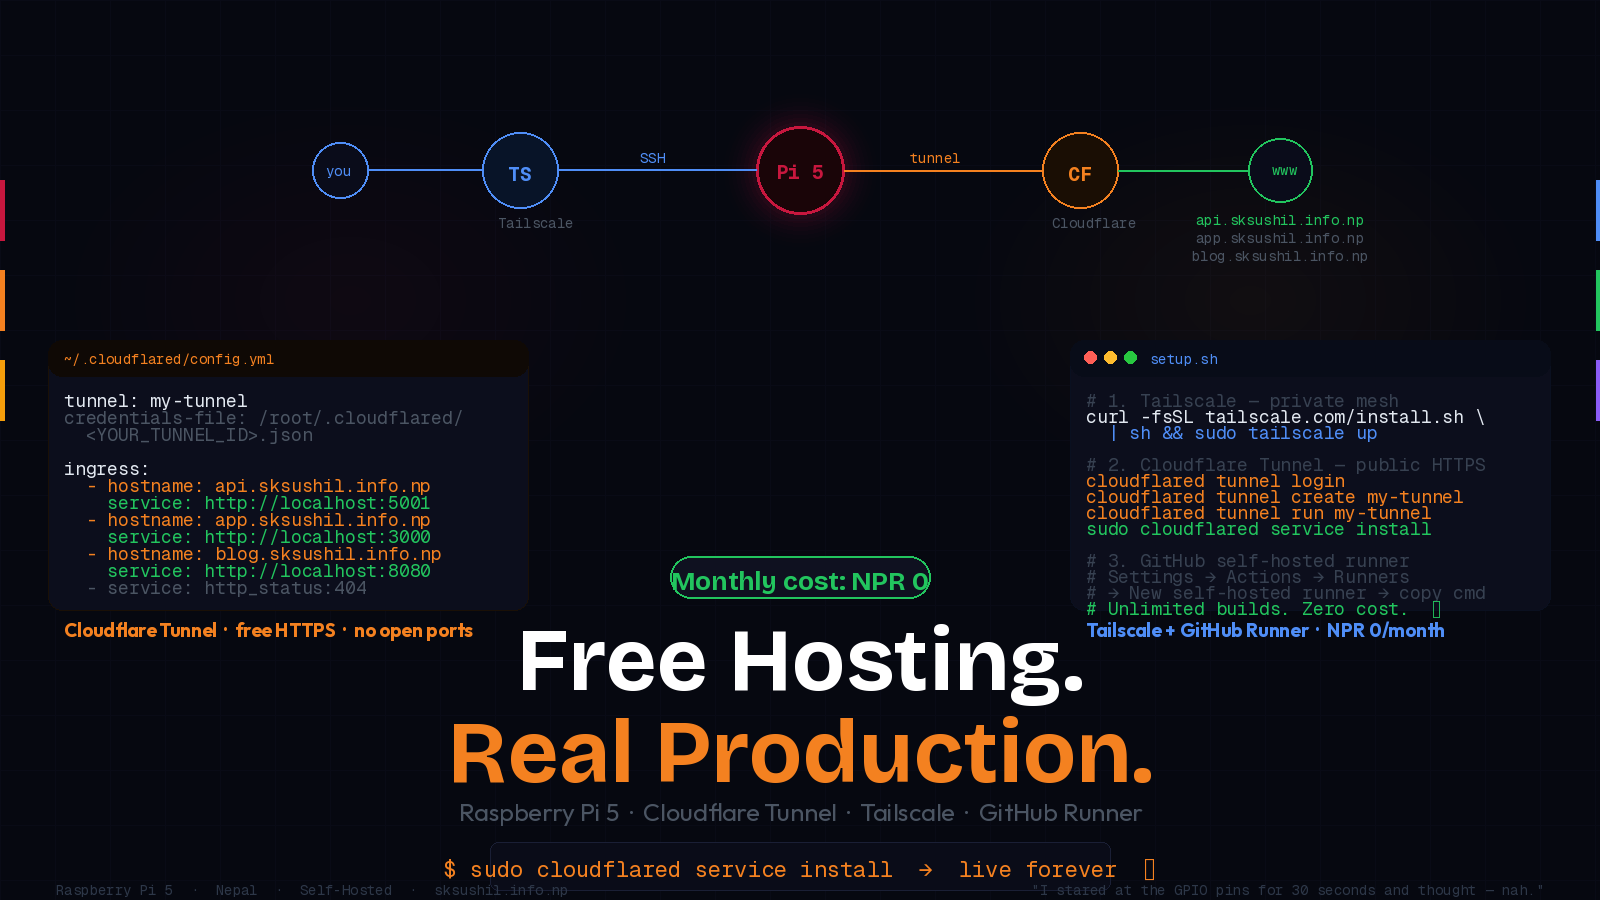
Configure your services
Create ~/.cloudflared/config.yml:
tunnel: my-tunnel
credentials-file: /root/.cloudflared/<YOUR<em>TUNNEL</em>ID>.json
ingress:
  - hostname: app.sksushil.info.np
    service: http://localhost:5000
  - service: http<em>status:404
Add DNS (automatically)
cloudflared tunnel route dns my-tunnel app.sksushil.info.npCloudflare creates the CNAME record for you. No manual DNS fiddling.
Launch it
cloudflared tunnel run my-tunnelYour local app is now live at https://app.sksushil.info.np — with automatic HTTPS,
no certificate headaches, nothing.
Make it permanent
sudo cloudflared service installNow it survives reboots. Set it and forget it.
\cloudflared service install registers the tunnel as a systemd service. It auto-starts
on boot and auto-restarts on crash — zero babysitting required.
\
The Real Magic: Multiple Services, One Tunnel
ingress:
  - hostname: api.sksushil.info.np
    service: http://localhost:5001
  - hostname: app.sksushil.info.np
    service: http://localhost:3000
  - hostname: blog.sksushil.info.np
    service: http://localhost:8080
  - service: http</em>status:404
API, frontend, and personal blog — all from one Pi, all publicly accessible, all secure. My ISP doesn't even know what's happening.
\
The Bonus: Self-Hosted GitHub CI/CD Runner
Here's where it gets even better. Remember those GitHub Actions minutes that run out when you're working on multiple projects?
I turned my Pi into a self-hosted GitHub runner.
Now my CI/CD pipelines run on my own hardware:
Unlimited build minutes No more "waiting for available runners" Faster builds on local network speeds Complete control over the build environment
Setting it up is straightforward — just add a runner in your GitHub repo settings, copy the registration command, run it on the Pi. Every push to your repos triggers builds on your own hardware. Zero cost. Zero limits.
\
The Full Stack — What's Running on the Pi
| Service | Tool | Cost | | -------------------- | ------------------ | ----------------- | | Remote SSH access | Tailscale | Free | | Public HTTPS hosting | Cloudflare Tunnel | Free | | SSL certificates | Cloudflare (auto) | Free | | DNS management | Cloudflare | Free | | CI/CD build runner | GitHub self-hosted | Free | | Hardware | Raspberry Pi 5 | One-time gift | | Monthly bill | — | NPR 0 |
The Irony
I got a Raspberry Pi to "play with" and ended up building a production-ready hosting server that costs me literally nothing extra per month.
Sometimes the best projects aren't about learning new hardware tricks — they're about solving real problems with the right tools.
Now, when my friends complain about hosting bills or remote access nightmares, I just smile and say: "Let me tell you about…"*
Tags
Subscribe to Newsletter
Get notified about new articles
Related Articles
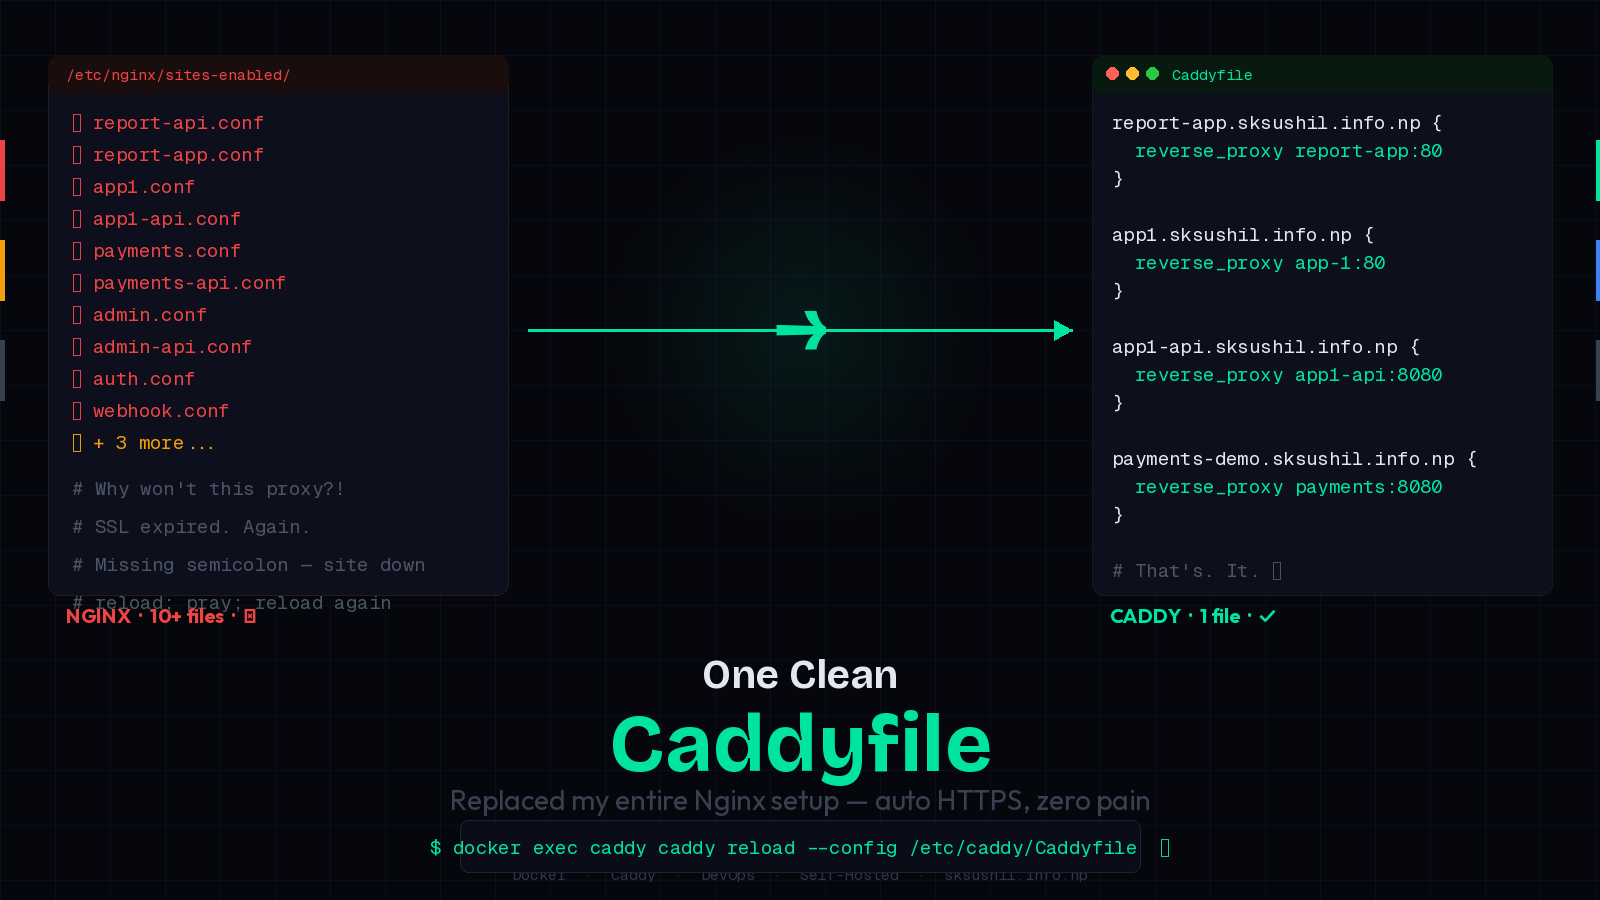
How I Replaced Nginx Chaos with One Clean Caddyfile
Tired of Nginx config hell? Here's how I replaced multiple Nginx config files with one elegant Caddy...
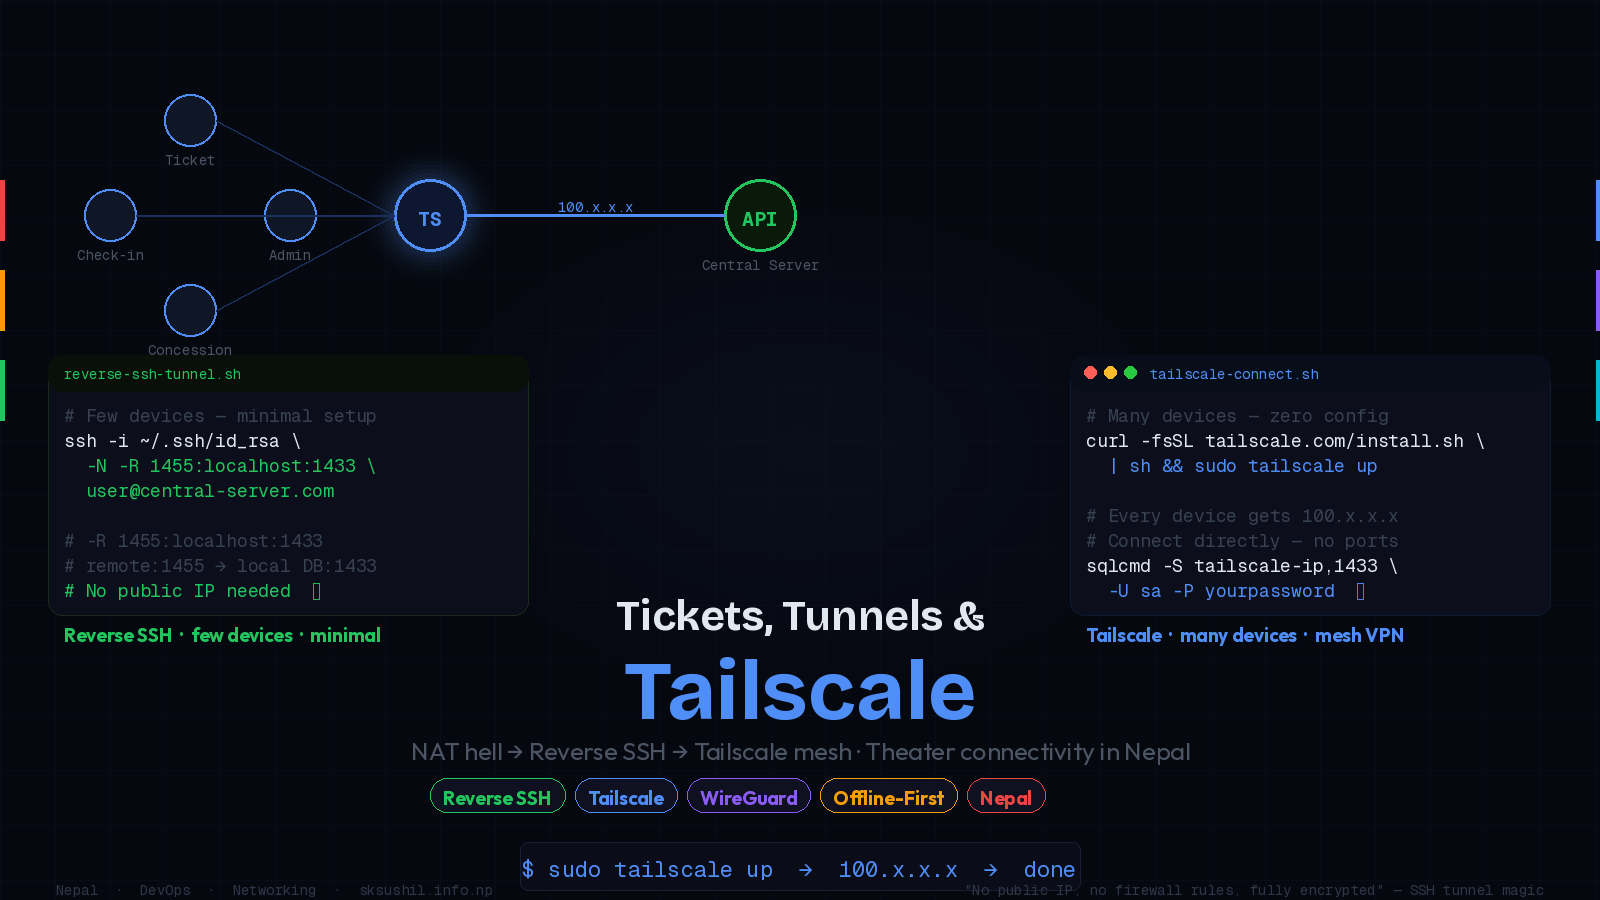
Tickets, Tunnels, and Tailscale: Journey to Simple Theater Connectivity
Instead of the central server reaching into a local DB (hard if it's behind NAT), the local device c...